How to Setup Your First Calendar
Setting up your first calendar can be overwhelming. Here is a quick guide on how to properly set up all your calendars for your meetings and scheduling needs.
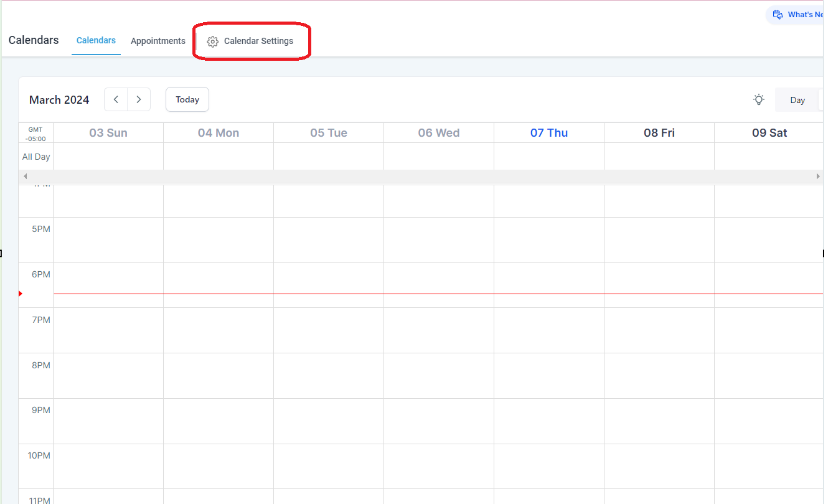
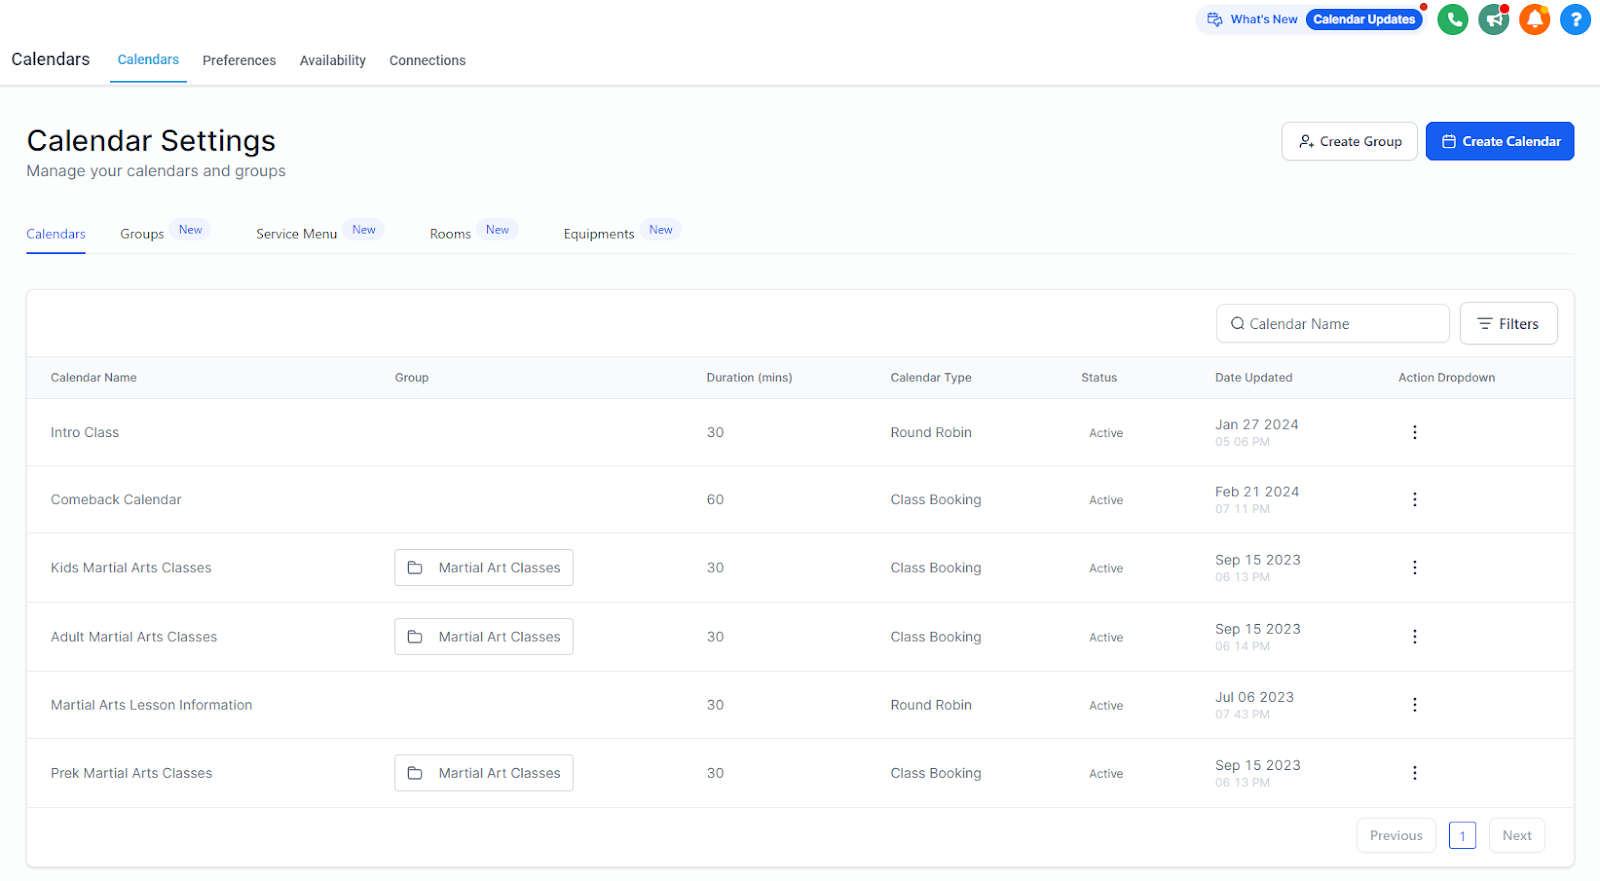
How to Access Calendar Settings
To access your calendar settings, click "Calendars" on the left, then "Calendar Settings" at the top.
Access the Calendar:
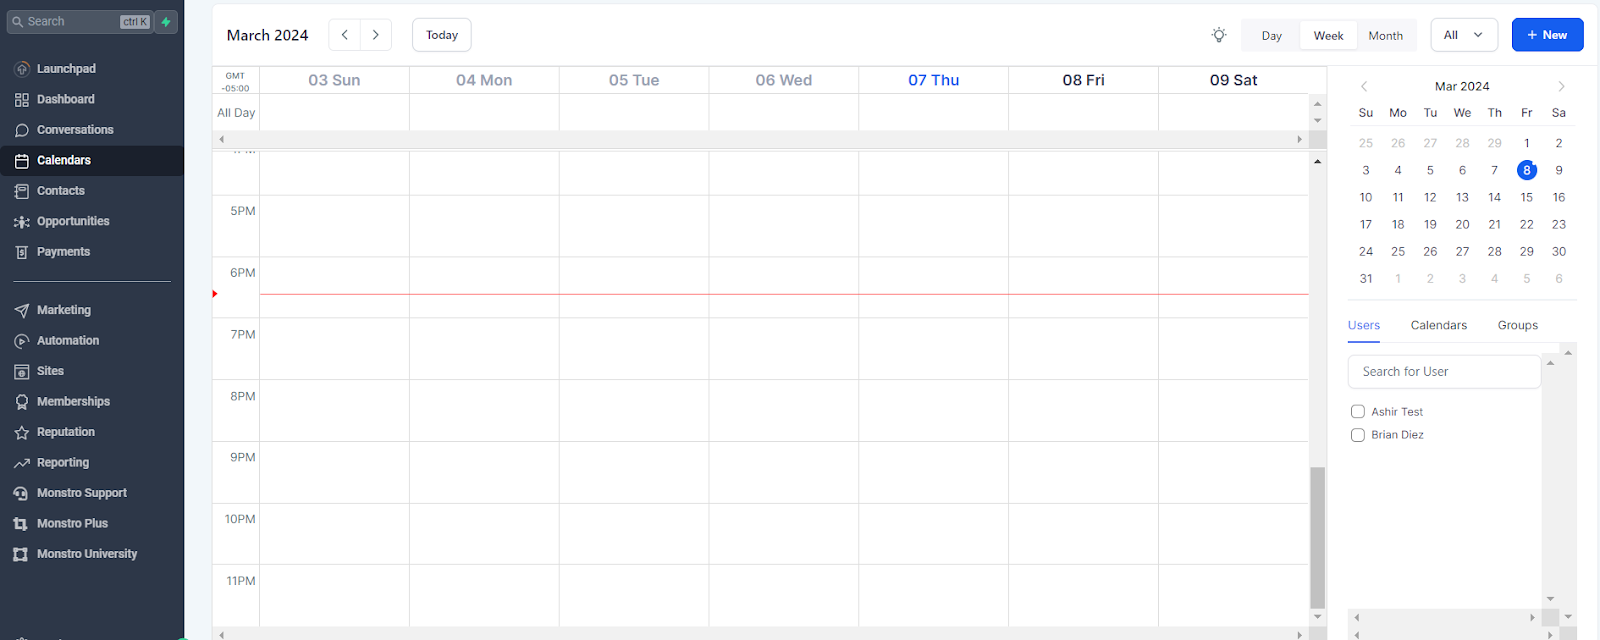
Navigate to the calendar section by clicking on the "Calendar" option in the navigation menu.
Locate the Calendar to Share:
Go to Calendar settings at the upper hand options and identify the specific calendar you want to share.
If you have multiple calendars, make sure you select the correct one.
Understand the Types of Calendars
There are five different types of calendars; however, you will primarily use three most frequently.

Simple Calendar: This is a basic calendar that you can use to allow people to schedule an appointment. You cannot assign multiple teams, nor can you designate leads to different sales agents or coaches.
Round Robin: This is similar to the simple calendar; however, you can assign multiple team members to the calendar and allow the calendar to allocate appointments based on your team's availability and weight. You can also allow users to select the staff they want to book with.
Class Booking: This has everything that Round Robin has but allows you to set a maximum seat amount per class, and you can only assign one team member per class calendar, and you cannot allow the users to select the staff they want to book with
Service Calendar: This is useful if you want people to be able to select multiple services and choose their own coach. However, availability for the service calendar is based on the staff's individual schedule and cannot be set on the calendar.
Collective Booking: This is good when you want to schedule one meeting and have multiple members of your team on the same meeting at once.
Meeting Details and Location
When setting up your calendar, you'll be required to fill out some meeting details. Most of these are straightforward, such as team member selection, the name of the calendar, description of the calendar, meeting duration, and availability.
You can also update your meeting locations for individual team members. There are a few options: Zoom, Phone, Google Meet, or Full Address. To access individual meeting locations, you must first select your team members (see image below).

Important: Some options may not appear on all calendar types.
Updating Your Availability
While you have already set up your basic availability when you created the calendar, such as days of the week and the time slots, you can fine-tune this with:
Meeting Interval: The interval determines the intervals for each meeting. For example, if you have availability set from 1PM to 5PM which is 4 hours. And you have a meeting duration of 30 minutes. Meeting intervals will determine when the slots will show up. If the interval is set to 1 hour. Then the meeting slots will be 1PM, 2PM, 3PM, and 4PM. If the interval is set to 15 minutes. Then the meeting slots will be 1:15PM, and 1:30PM.
There would not be a 1:45 PM slot even though the interval is every 15 minutes, but the meeting duration is 30 minutes so if there is a lot between 1:45 then the meeting would go over the availability range.
Meeting Duration: this is straightforward and can affect the slots that show up on your calendar. If you set your availability from 5PM to 6PM and your meeting duration is more than 60 minutes or hour, then nothing will show up. The meeting duration + buffer time must be able to fit within your availability time frame.
**Minimum Scheduling Notice: ** This is the minimum required buffer time before a user can schedule a meeting. Meaning, if you don't want to take meetings on the same day, you would want to set this to 1 day.
Date Range: This is straightforward; how far will you allow the user to book? We recommend no more than 14 days; 7 days is more ideal, as meetings beyond 14 days will likely end up in a no-show.
Buffer Time: The buffer time is how much gap or buffer you want between each meeting. Buffer time will affect the available slots that show up on the calendar. For example, if you have 1 hour of availability with a meeting duration of 10 minutes and a buffer of 5 minutes, you will only have 3 slots available during that hour. 10 + 5 minutes buffer equals 15 minutes. The slots will be 5:15 PM, 5:30 PM, 5:45 PM.
Forms & Payment
This section is also pretty straightforward. You can use the default form, which will ask the user for First Name, Last Name, Email, Phone, and Notes. Or you can set up your custom form by creating a custom form under Sites -> Forms.
Confirmation page: Whether you want the calendar to show a popup confirmation message or redirect them to another page on your website.
Auto-confirm new calendar meetings: When this option is turned on, all meetings will have a Confirmed status; if turned off, all meetings will have a New status.
Notifications & Additional Options
Most of these options are straightforward. This is where you can configure who will be notified when a new meeting is booked.

Customizations
This is where you can customize how the calendar looks, such as the calendar title, and the text on the bottom. If you know how to use CSS styling, you can further design the look and feel of your calendar.

Group Calendars
You can create groups and add multiple calendars in a group. Group calendar itself is not a calendar but rather a way for you to bundle similar calendars in a group that allows you to provide one shareable link.
When a Group Calendar link is shared with a user. The user will see all the calendars in the group and be able to choose the calendar that best fits their needs.
Adding a Calendar to Group
You can easily add any calendar to a group provided they don’t already belong to another group by clicking on the 3 dot menu beside the calendar and selecting Move to Group then choosing the group you want to add the calendar to.
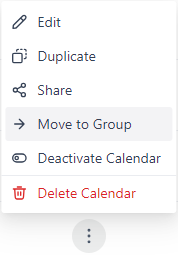
Removing a Calendar to Group
Removing a calendar from a group is easy. Click the 3 dot menu to the right of the calendar that you want to remove. Select Move Group and select Unassign (No Group).
How to Activate Your Calendar
- Access the Dashboard:
Once logged in, you'll typically land on the dashboard or home screen of your account.
- Navigate to the Calendar Section
Look for the "Calendar" option in the navigation menu. It's often found on the left-hand side of the dashboard.
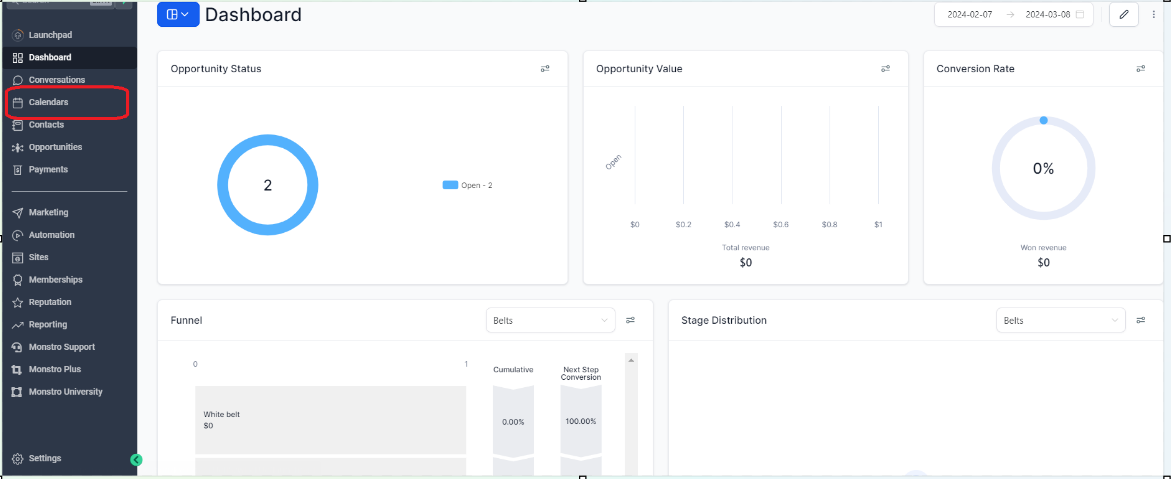
Click on "Calendar settings" to access the calendar management
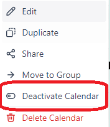
- Activate Calendar:
Click on 3 dotted lines on the far right-side of the calendar you wish to activate
Click on “Activate Calendar”. If the calendar is already activated. The option should show “Deactivate Calendar” instead.

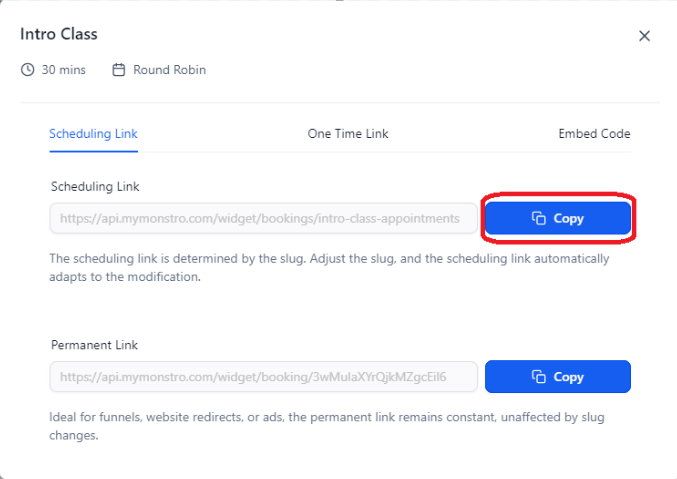
How to Share Your Calendar Via Links
Look for the calendar you wish to share. Look for 3 dotted-lines options to share or export the calendar. This option is often represented by an icon or button with a "share" symbol.

Click on the share option to generate a shareable link.

Copy the Link: Once the shareable link is generated, click on it to copy it to your clipboard. Alternatively, there may be a "Copy Link" button available that you can click to copy the link.
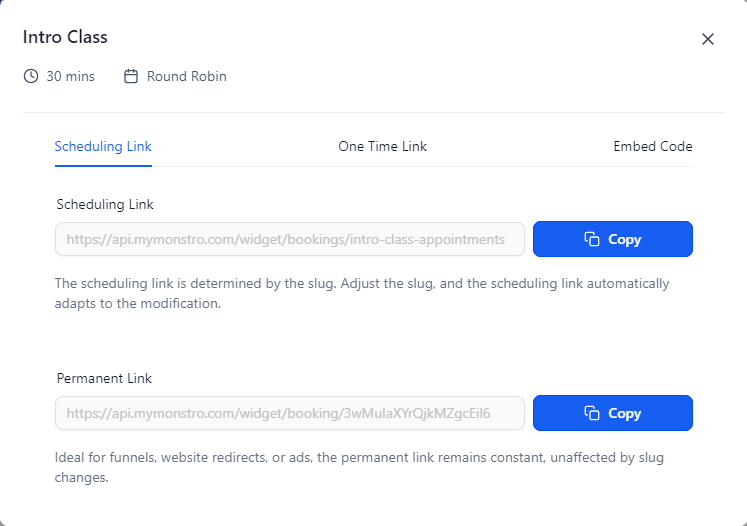
Share the Link:
-
Now that you have copied the shareable link, you can share it with others via various methods, such as email, messaging apps, or social media platforms.
-
You can paste the link into the body of an email, a chat message, or any other communication platform where you want to share it.
Adjust Permissions (Optional):
-
Depending on your preferences, you may want to adjust the permissions associated with the shared calendar link.
-
Some calendar-sharing features allow you to specify whether recipients can view events only or have additional editing privileges.
Send the Link: Send the shared calendar link to the intended recipients.
Important note:
-
Before sending the link to others, it's a good idea to test it yourself to ensure that it works correctly.
-
Paste the link into a web browser to verify that it opens the shared calendar as expected.
How to Embed Your Calendar
Locate the Calendar to Embed:
Identify the specific calendar you want to embed. If you have multiple calendars, make sure you select the correct one.
Find the Embed Options: Look for an option under share option.
Select Generate Embed Code:
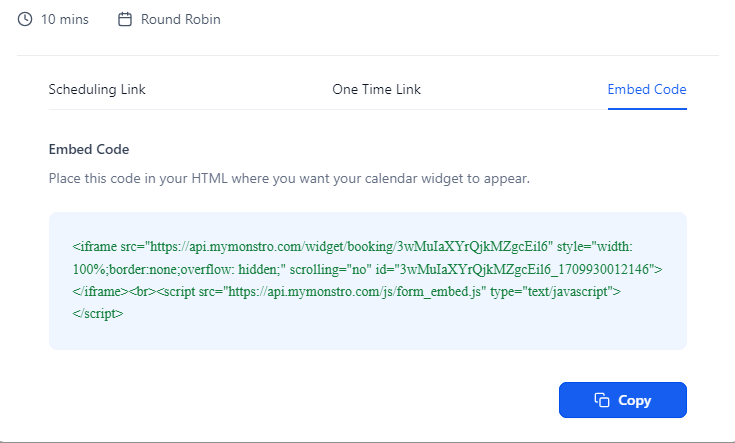

Click on the embed option to generate the embed code for your calendar.
The embed code is typically a snippet of HTML code that you can insert into your website or web page to display the calendar.
Once the embed code is generated, click on it to select it. Then, right-click and choose the "Copy" option from the context menu. Alternatively, you can use keyboard shortcuts like Ctrl+C (Windows) or Command+C (Mac) to copy the code.
Paste the Embed Code:
Navigate to the web page or platform where you want to embed the calendar.
Access the HTML editor or content management system (CMS) where you can add custom code.
Paste the copied embed code into the appropriate section of your web page or CMS.
Common Troubleshooting
Here are some commonly asked questions or issues you may run into when working with calendars on Monstro.
There are no times showing up on the calendar.
There are many reasons why this can happen:
-
Make sure your calendar is active and not in draft mode.
-
Check if your meeting interval is not properly set up. If you have 30 minutes availability but your interval is set to 45 minutes, then no slots will show up.
-
Buffer time issue. Again, if you have 1 hour availability but your interval is set for 50 minutes and your buffer is 15 minutes, which means each slot will require 65 minutes, that's more than 1 hour. Thus, the calendar won't show any slots.
-
Conflict with your team's availability. Your team members can set their own availability under their profile. If your calendar has Monday 5 PM to 6 PM available but none of your assigned team members are available during those hours, then no slots will show up.